latitude 34deg 51'South, longitude 148deg 58 East
For details about LSO observatory now that it is operational, click on The Facility in the menu.
Construction
The slideshow gives an overview of the site under construction. Click on any image for more detail.
Scroll down for a breakdown on the steps of the construction.
(For changes that have occurred since this construction, such as drive changes, modifications, etc, go here.

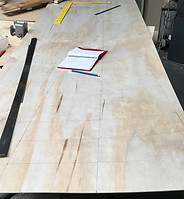
The ring sits on a 'wooden sandwich' roof
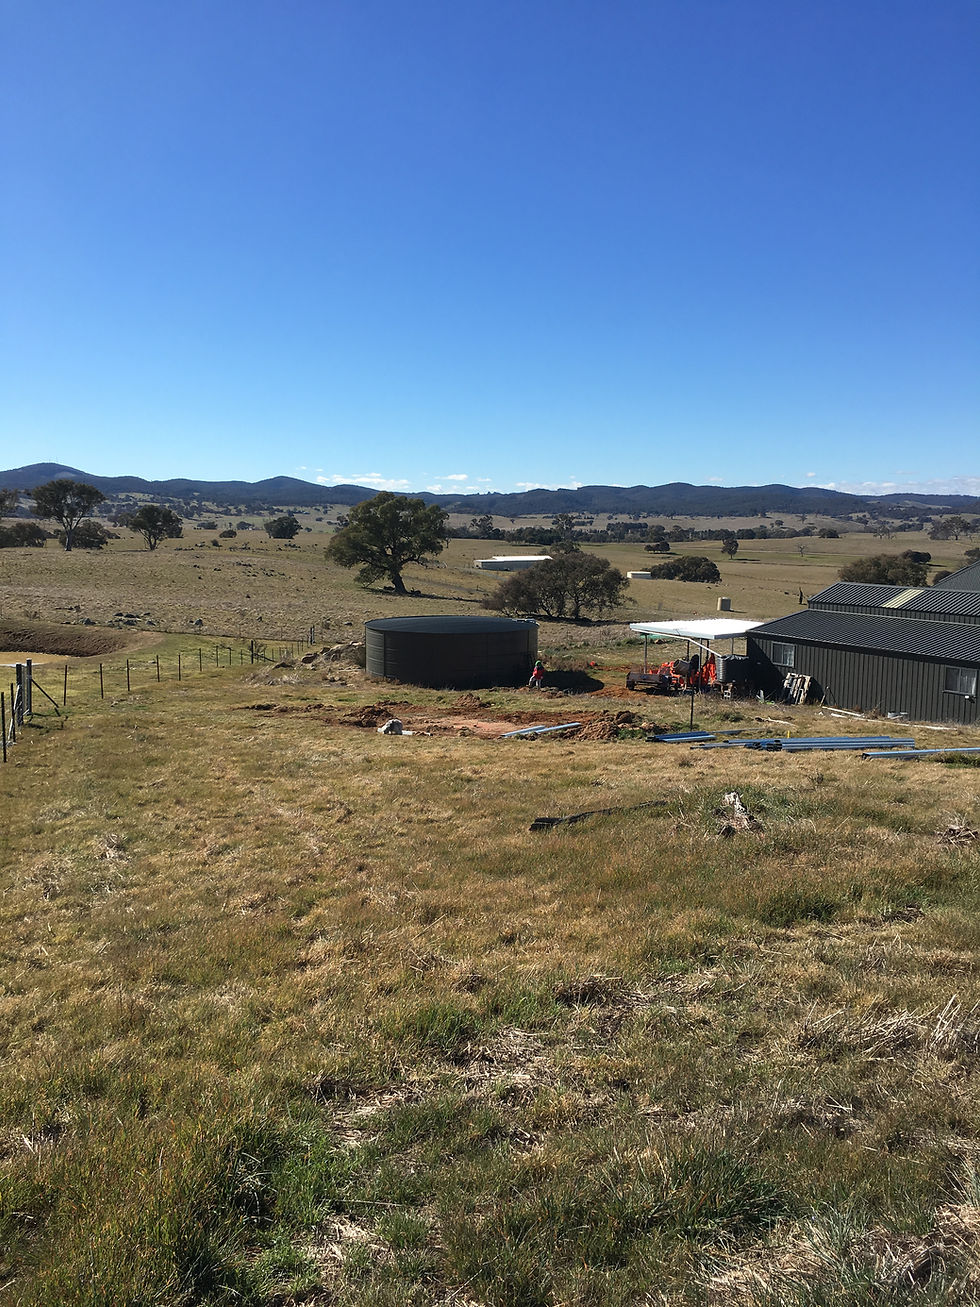
The ground has been scraped...

Exterior quality undercoat
The ring sits on a 'wooden sandwich' roof
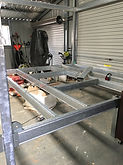
Having a very large workshop can come in handy! The entire 3m x 3m x 2.4m metal frame of the dome room was able to be cut, drilled and assembled inside before being broken down and re-assembled on site.


The first post is concreted in! Now the observatory is real!
The first stage booster is on the pad...
It was LOTS of fun getting the pier formwork ready and took three different attempts.
The big pad in place.
Note the piece of granite showing in the side- even with the rocks it took over 30 bags to cast this monster!
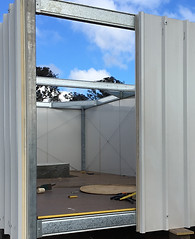
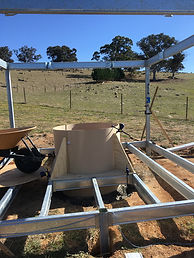
Looking inside- some idea of the size of the two rooms is possible now. It's very roomy.

The jig for routing the rings. For this dome I took the time to make a very flexible setup to cater for the range of arcs involved..

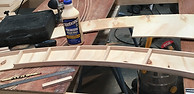
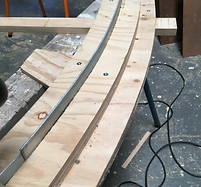
All the upper segments are made in jigs, using a 7mm ply outer layer and pine 19mm x 10mm internal bracing strips.
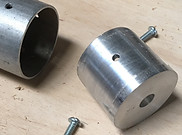

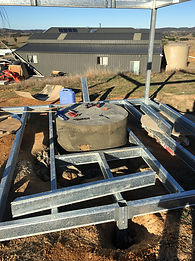
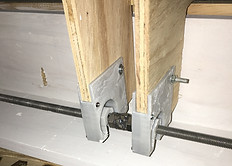
The pier-pod is anchored to the concrete pad with this machined bracket. A 12mm loxon bolt is fixed into the concrete, the bracket screws to it, the aluminium shaft is screwed to the bracket, and a bolt through the pier-pod goes though that- simples...
The cladding is on! This was a mammoth effort racing ahead of gale force winds, rain and plunging temperatures (-3C). Now to concentrate on the dome components.
The 3m x 150mm base ring is down- 2 layers of 12mm thick structural ply. This will have a 1oo x 24mm ring added to hold the metal roller guide ring.

Progressing around the base building the upper ring. (Nothing like an EQ8 counterweight to help hold things down!)

'Clock' routing the inner edge of the completed base ring. Purely for aesthetic and finish reasons. The outer edge of the top ring is routed to match the rotating ring, minus 3mm to allow for the skirt and...
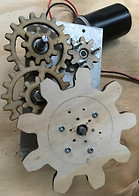
My steampunk gearbox to slow the wiper motor rotation drive down. Each laser-cut gear pair is 1:2 and is centred on the shaft using two skateboard bearings.
...the clock router setup is also used to cut a 3mm x 15mm groove to hold the metal roller ring. The overlap is to allow for expansion/contraction in a climate that goes from 45C to -10C.
Laminating the giant planetary drive gear. Three layers of 3mm plywood.
(You can never have too many clamps...)


The gear in place. It rotates the ring in about 90 seconds.
The 8 rollers are basic 50mm rubber wheeled models, with a V carved into the wheel to help keep them centred.

Initial setup of one shutter. The drawer slide works great.
The shutters are moved using a motorised metal rod.
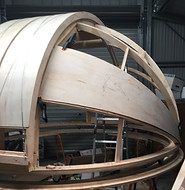
Trial placement of the ribs. These actually went into place remarkably easily. The beauty of this system is that all ribs are essentially the same, and all skin sections (gores) are the same. The thin pieces can be moved to ensure the gores are spaced evenly.


Detail of the drive mechanism. At the centre are two nuts, welded together. One is LH thread and the other is RH thread. Into these are threaded two rods, LH thread and RH thread. A repurposed small drill turns the combined rod, and traveller nuts (inside the 3D printed adaptors) can move in opposite directions along it, taking the shutters with them. It takes about 30 seconds to open or close the shutters, but this can be varied at the control box.
The shutter motor is a battery drill with reversing and speed control. The 1:1 gearing is to offset the drill from the curve of the dome.
Drawing up the gore template. Hopefully this will do for most of the sections without much adapting!
Gluing gores. Three is about the limit for gluing in one go.
Trial fitting the first gore. Very little trimming was needed!
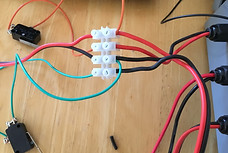
Dome control box. This interfaces with the computer but includes the manual controls for rotation and shutter. It is in the cold room.
Shutter stop switches. Triggering either limits the motor to running in the other direction only.


Shutter join overlap. First, a 50mm strip of 3mm ply on one edge for clearance, then a 100mm strip.

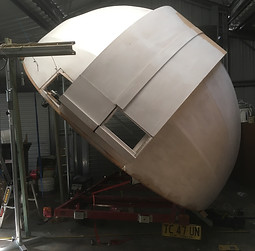
Fibreglass webbing added, then sanded and painted with compatible undercoat.
Main covering finished. Now to reinforce the joins with fibreglass tape.

Filling any gaps with builders bog and sand back before fibreglassing.

Exterior quality undercoat goes on.

How to fit a 3m dome out a 2.7m door...
The base ring has already been removed, ready for fitting to the roof of the cold room.
The dome is being anchored to a low boat trailer for its short trip out the door.
The shed gives up its secret. Careful modelling in SketchUp was matched in reality- despite forgetting to include the height of the boat trailer the dome now sits on! About 3cm clearance all round.
Before the dome can go on the roof the base ring has to be secured. Four 12mmply/35mm pine 'sandwiches' make up the roof-with-a-hole for this to go onto. Here it is in place, waiting...


...for the dome to arrive!
Getting it on turned out much easier than I'd thought, thanks to good neighbours helping. It just slid up some rails and into place.


High Wind tie-downs for shutter and dome. Since it went up we've had 70kph gusts without it even looking like moving.

_JPG.jpg)
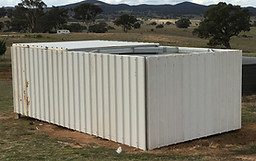
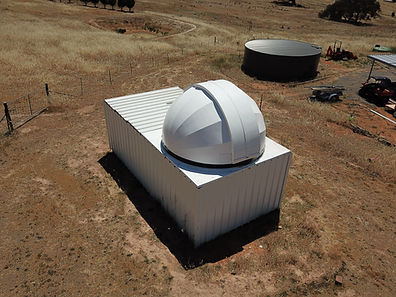
FINISHED!
Well- almost. Not shown in this aerial shot is the metal edge trim for the roof, steps and deck to the door, weather station, radio telescope antennae, etc, etc.
And all the inside work still to do!
But I'm definitely calling finished on 'Observatory Construction"!